 |
|
|
|
|
|
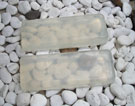
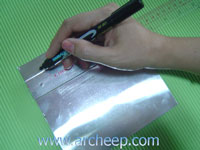
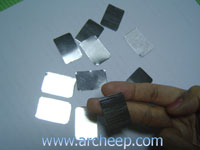
1.วัดขนาดแผ่นอลูมิเนียม
กว้าง 2 cm x ยาว 3
cm |
|
| |
|
|
 |
|
|
|
|
|
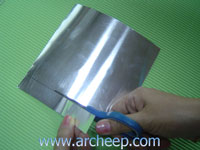
2.นำกรรไกรตัดแผ่นอลูมิเนียมที่วัดขนาดแล้ว |
|
| |
|
|
 |
|
|
|
|
|
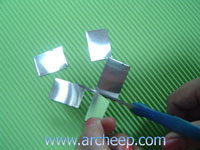
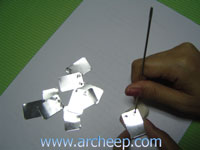
3.
ตัดแผ่นอลูมิเนียมเตรียมไว้ 10 ชิ้น |
|
| |
|
|
 |
|
|
|
|
|
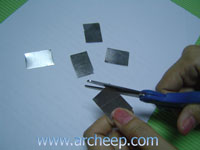
4.
ตัดแผ่นอลูมิเนียมทั้ง 4
มุม ให้โค้งมนดูสวยงาม |
|
| |
|
|
 |
|
|
|
|
|
5.
เตรียมแผ่นอลูมิเนียม 10
แผ่น ที่ตัดมุมแล้ว |
|
| |
|
|
 |
|
|
|
|
|
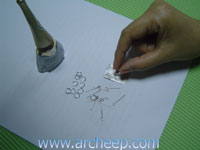
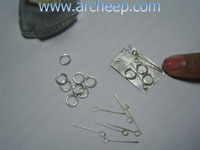
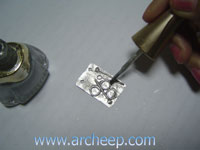
6.
นำชิ้นงานวางบนยางลบดินสอนำเข็มเล่มใหญ่เจาะ 2 รู
ลงบนชิ้นงานให้ครบ 10 แผ่น |
|
| |
|
|
 |
|
|
|
|
|
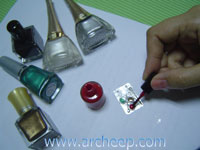
7.
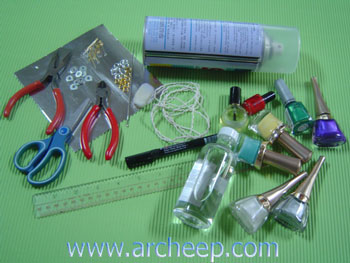
นำน้ำยาทาเล็บสีเงินมุกทาลงบนชิ้นงานให้ทั่ว |
|
| |
|
|
 |
|
|
|
|
|
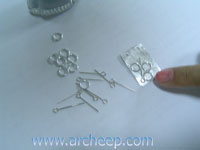
8.
รีบนำห่วงเล็กสีเงินวางบนชิ้นงาน |
|
| |
|
|
 |
|
|
|
|
|
9.
นำลวดเงินวางตอนที่น้ำยาทาเล็บยังไม่ทันแห้ง |
|
|
|
|
 |
|
|
|
|
|
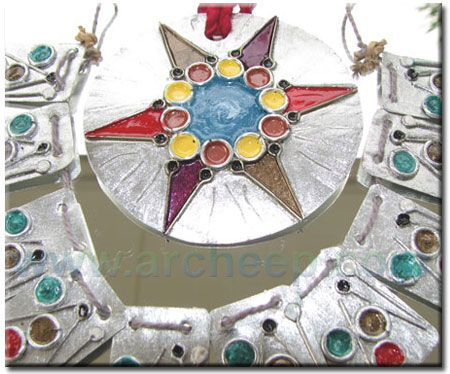
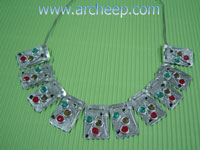
10.จัดวางห่วงพร้อมลวดเงินตอนที่น้ำยาทาเล็บยังไม่ทันแห้งจัดวางให้เหมือนกันทั้ง
10 ชิ้นงาน
|
|
|
|
|
 |
|
|
|
|
|
11.นำน้ำยาทาเล็บสีเงินมุกทาเคลือบซ้ำลงบนชิ้นงานที่จัดวางเตรียมไว้ทั้ง
10 ชิ้นงาน |
|
|
|
|
 |
|
|
|
|
|
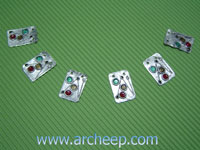
12.
นำน้ำยาทาเล็บสีต่าง ๆ
ที่ชอบหยอดลงไปในห่วงที่จัดวางไว้ |
|
|
|
|
 |
|
|
|
|
|
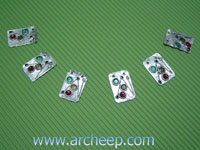
13.
นำน้ำยาทาเล็บสีต่าง ๆ
ที่ชอบหยอดลงไปในห่วงที่จัดวางไว้ให้ครบ 10
ชิ้นงานรอให้สีแห้งสนิท |
|
|
|
|
 |
|
|
|
|
|
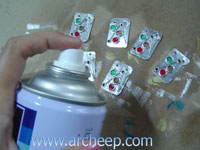
14.
นำสเปรย์แล็คเกอร์เงา
A 10
ฉีดพ่นชิ้นงานให้ทั่วรอให้แห้งสนิท |
|
|
|
|
 |
|
|
|
|
|
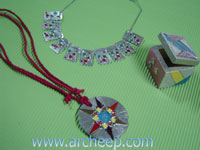
15.นำเชือกร้อยเข้ากับเข็มกะความยาวของเชือกที่จะร้อย |
|
|
|
|
 |
|
|
|
|
|
16.นำชิ้นงานที่แห้งสนิทมาเรียงเตรียมไว้ |
|
|
|
|
 |
|
|
|
|
|
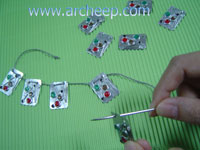
17.นำเชือกร้อยเข้ากับชิ้นงานที่เจาะรูไว้ |
|
|
|
|
 |
|
|
|
|
|
18.นำเชือกร้อยเข้ากับชิ้นงานที่ทำเตรียมไว้จนครบ |
|
|
|
|
 |
|
|
|
|
|
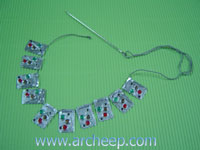
19.
ผูกปลายเชือกเข้าหากันก็ได้เครื่องประดับใส่ที่คอดูเก๋ไม่เหมือนใครแล้วค่ะ |
|
|
|
|
 |
|
|
|
|
|
20.
ลองทำเครื่องประดับแฟนซีหลาย ๆ รูปแบบ หรือ
ทำเพ้นท์ลงกล่องไม้เอาไว้ใส่เครื่องประดับดูสวยมีราคาค่ะ |
|
|
|
|